
Website chat (AI)
The website chat is a chat button on your website. Visitors' questions are answered by AI only from the knowledge you give it: FAQ pages on your website and text you write in the settings. Visitors can also check their order status and send a question to your e-mail. All conversations are visible in ZERPY.
In the menu it is under Support:
- Website chat — the conversations. Visible to the owner, admin, member and sales roles (area Website chat). The accountant and viewer do not see it.
- Chat settings — owner and admin only.
What you need
- Your own AI key: Anthropic or OpenAI. AI costs come from your AI account, not from ZERPY.
- Knowledge: FAQ pages and/or written text.
The AI does not see your ZERPY data (prices, stock, customers) — it answers only from the knowledge. The order status check is a separate form, not the AI.
Setting it up
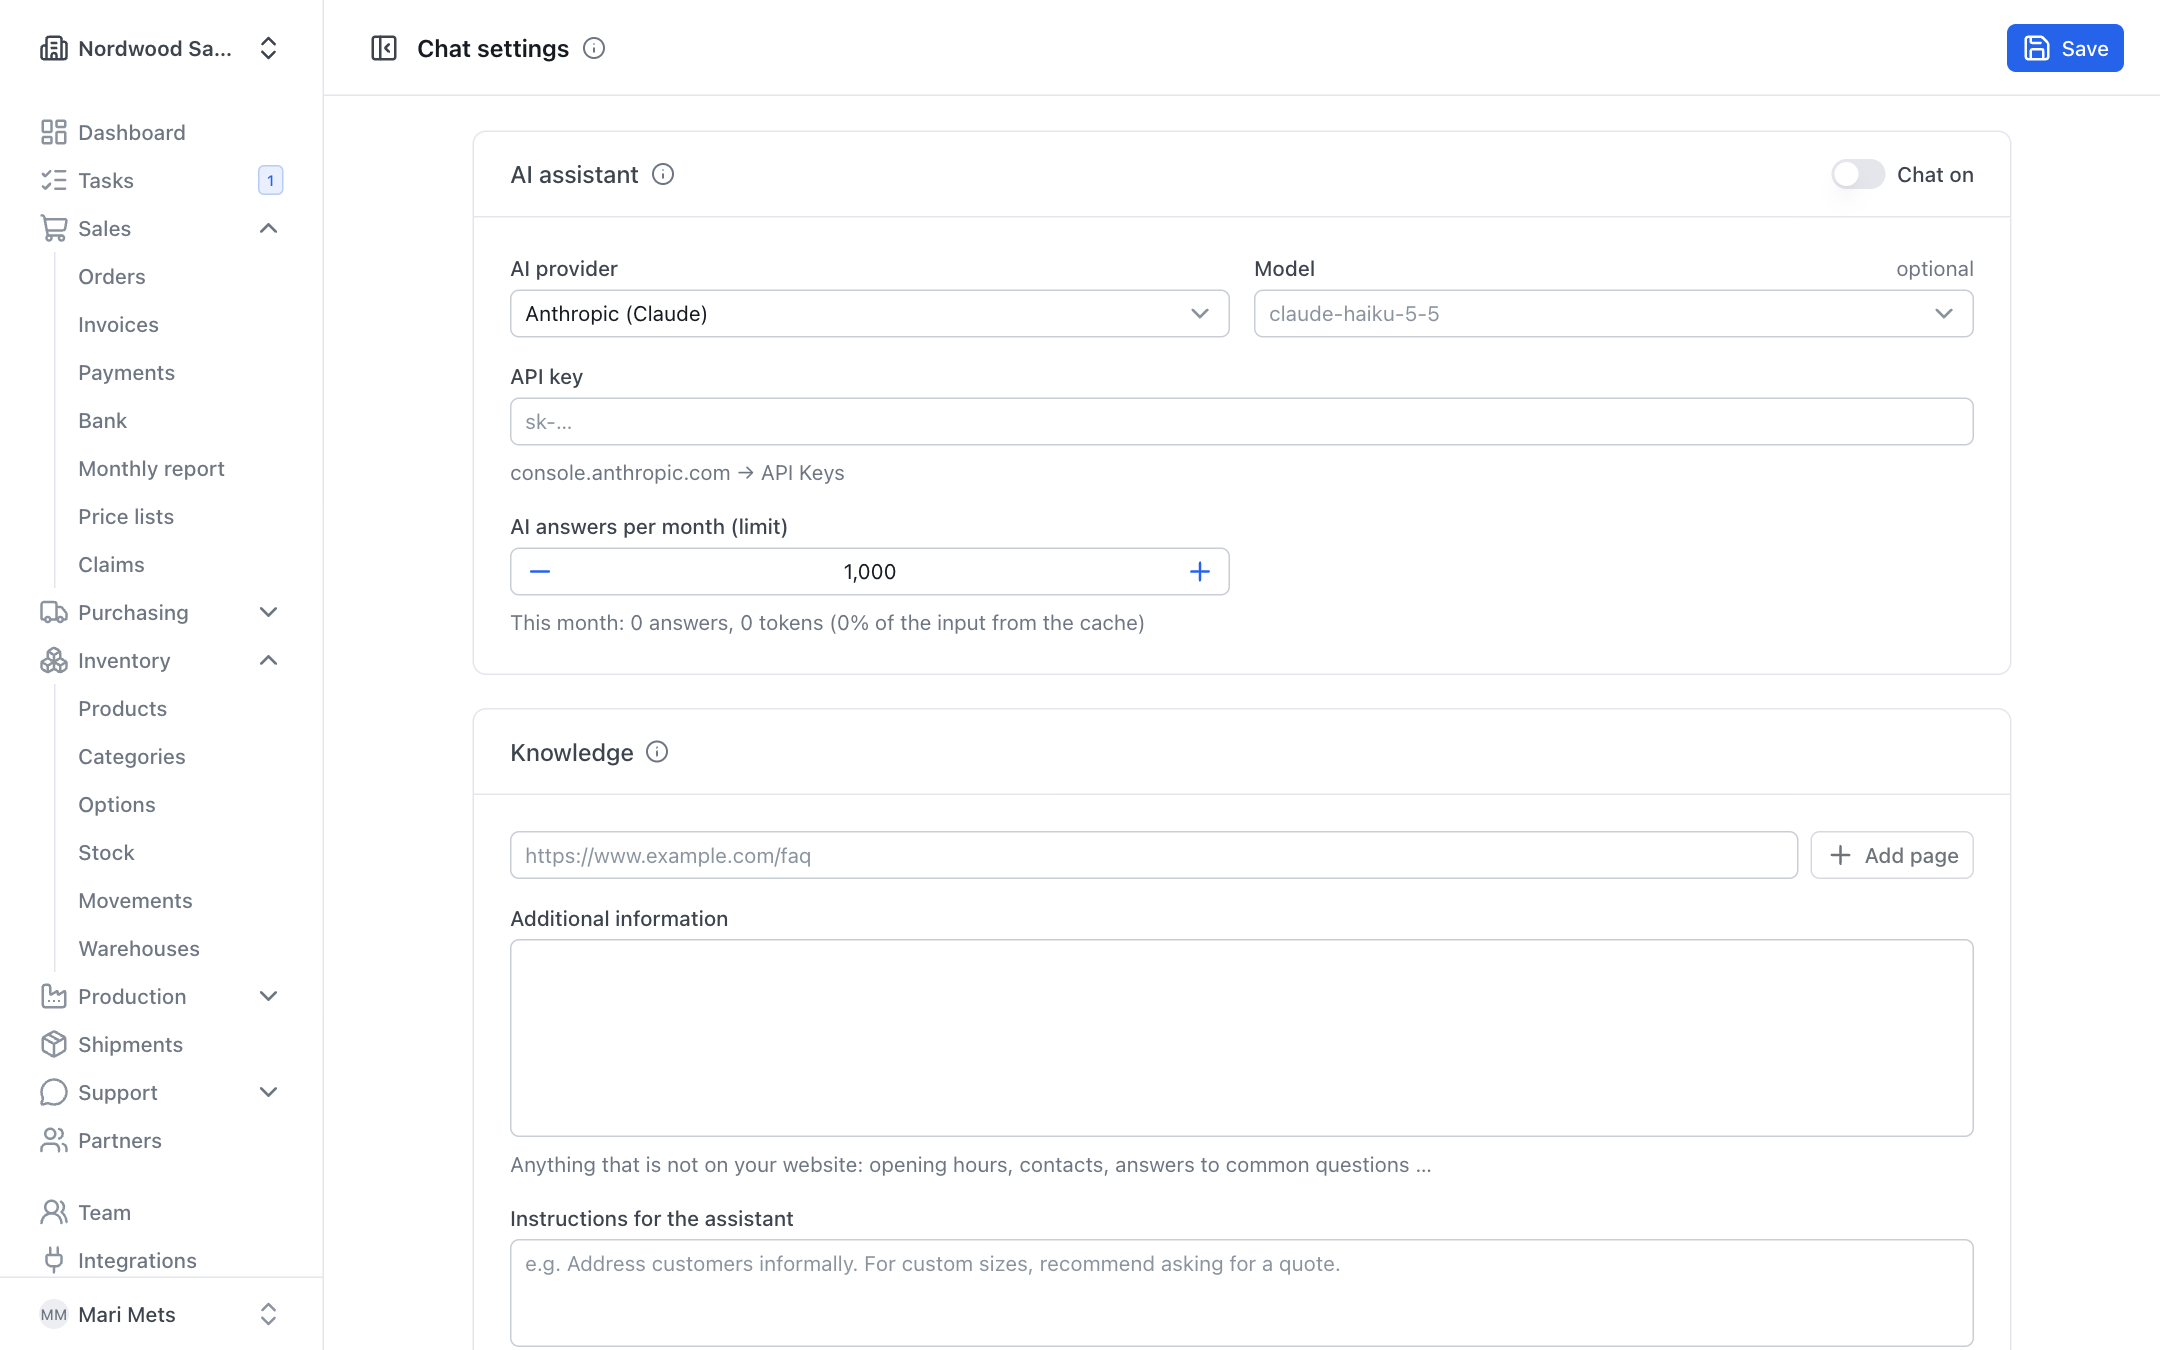
Open Support → Chat settings.
AI assistant
- Choose the AI provider and the Model (the default is a cheaper, fast model).
- Paste the API key. The key is stored encrypted and never shown again — enter a new one to replace it.
- AI answers per month (limit) — the most AI answers per calendar month (default 1000). This keeps costs under control.
- Switch on Chat on and save. On saving ZERPY checks with a tiny request that the key works.
The card also shows this month's usage: number of answers and tokens.
Knowledge
- Add the addresses of your FAQ or other web pages and click Add page (up to 20 pages). ZERPY reads the page text; each page shows its status (Read, Error, Waiting) and number of characters. Pages are read again every day; Read again reads one right away.
- Additional information — anything that is not on your website: opening hours, contacts, answers to common questions.
- Instructions for the assistant — optional: tone, what to recommend, what not to promise (e.g. "For custom sizes, recommend asking for a quote").
Help for visitors
- Forward unanswered questions to — when the assistant cannot help, the visitor can send the question with their e-mail to this address. You reply directly to them.
- Order status — visitors can check their order with the order number and the e-mail on the order.
Chat on your website
- Title and Greeting.
- Colour — chat button, header and the visitor's messages; the text colour is chosen automatically.
- Background colour and Text colour — empty = default (light or dark depending on the visitor's device). If the text is hard to read on the background, you see a warning.
- Preview shows how the chat looks.
- Allowed websites — only these sites can show the chat. Empty = any site; add your site before going live.
Adding it to your website
- Save the settings — the code line then appears under Add to your website.
- Click Copy.
- Paste the line at the end of every page, before the closing body tag (WordPress, Shopify, Wix: custom code / footer scripts).
The chat button appears in the corner of the page. Open chat opens the chat in a new window for testing. New widget key creates new code — then update the code line on your website too.
Trying it
On the Try it card you can ask a test question and see what the AI would answer. Test chats are not saved.
What the visitor sees
- The AI answers from the knowledge, with the note "Answers are generated by AI".
- When a forwarding address is set, the chat has a Contact our team button, and the AI suggests it when it does not know the answer: the visitor enters an e-mail, optionally a name, and the question, and it is sent to your address together with the conversation.
- Order status: the visitor enters the order number and the e-mail used for the order. They see the status, dates, lines (without prices) and shipments with tracking. A wrong number and a wrong e-mail get the same answer, so nobody can guess other people's orders.
The number of messages is limited to prevent abuse.
Conversations and replying
Support → Website chat lists all conversations: question, contact, number of messages, last message and status (Open, Forwarded, Handled). Not answered marks conversations the AI could not answer. Search in messages or by e-mail.
Open a conversation to see it from start to finish.
Replying by e-mail
When the visitor left an e-mail address (forwarded the question or checked an order), the conversation has a Reply by e-mail to … form.
- Write your reply.
- Click Send reply.
The reply is sent from your company name and the customer can answer by e-mail. The conversation is marked handled, and the reply also shows in the chat when the visitor opens it again. The conversation shows the e-mail's state (E-mail waiting, E-mail sent, E-mail failed).
If the visitor left no e-mail address, you cannot reply.
Other actions
- Mark handled / Reopen.
- Delete — the messages are deleted permanently (e.g. when a visitor asks to remove their data).
Conversations older than 12 months are deleted automatically.