
Products
Inventory → Products holds all your products and services: price, stock, images and suppliers. From here products flow into orders, invoices, purchasing, production, the partner portal and your webshop.
Who can change products
Products are added and changed by the owner, admin, member and purchasing roles. Other roles can see products but not change them.
Stock item or service
Every product has a Type:
- Stock item – physical goods whose quantity ZERPY tracks (see Inventory).
- Service – work or a service (installation, transport, cutting …). A service has no stock.
Adding a product
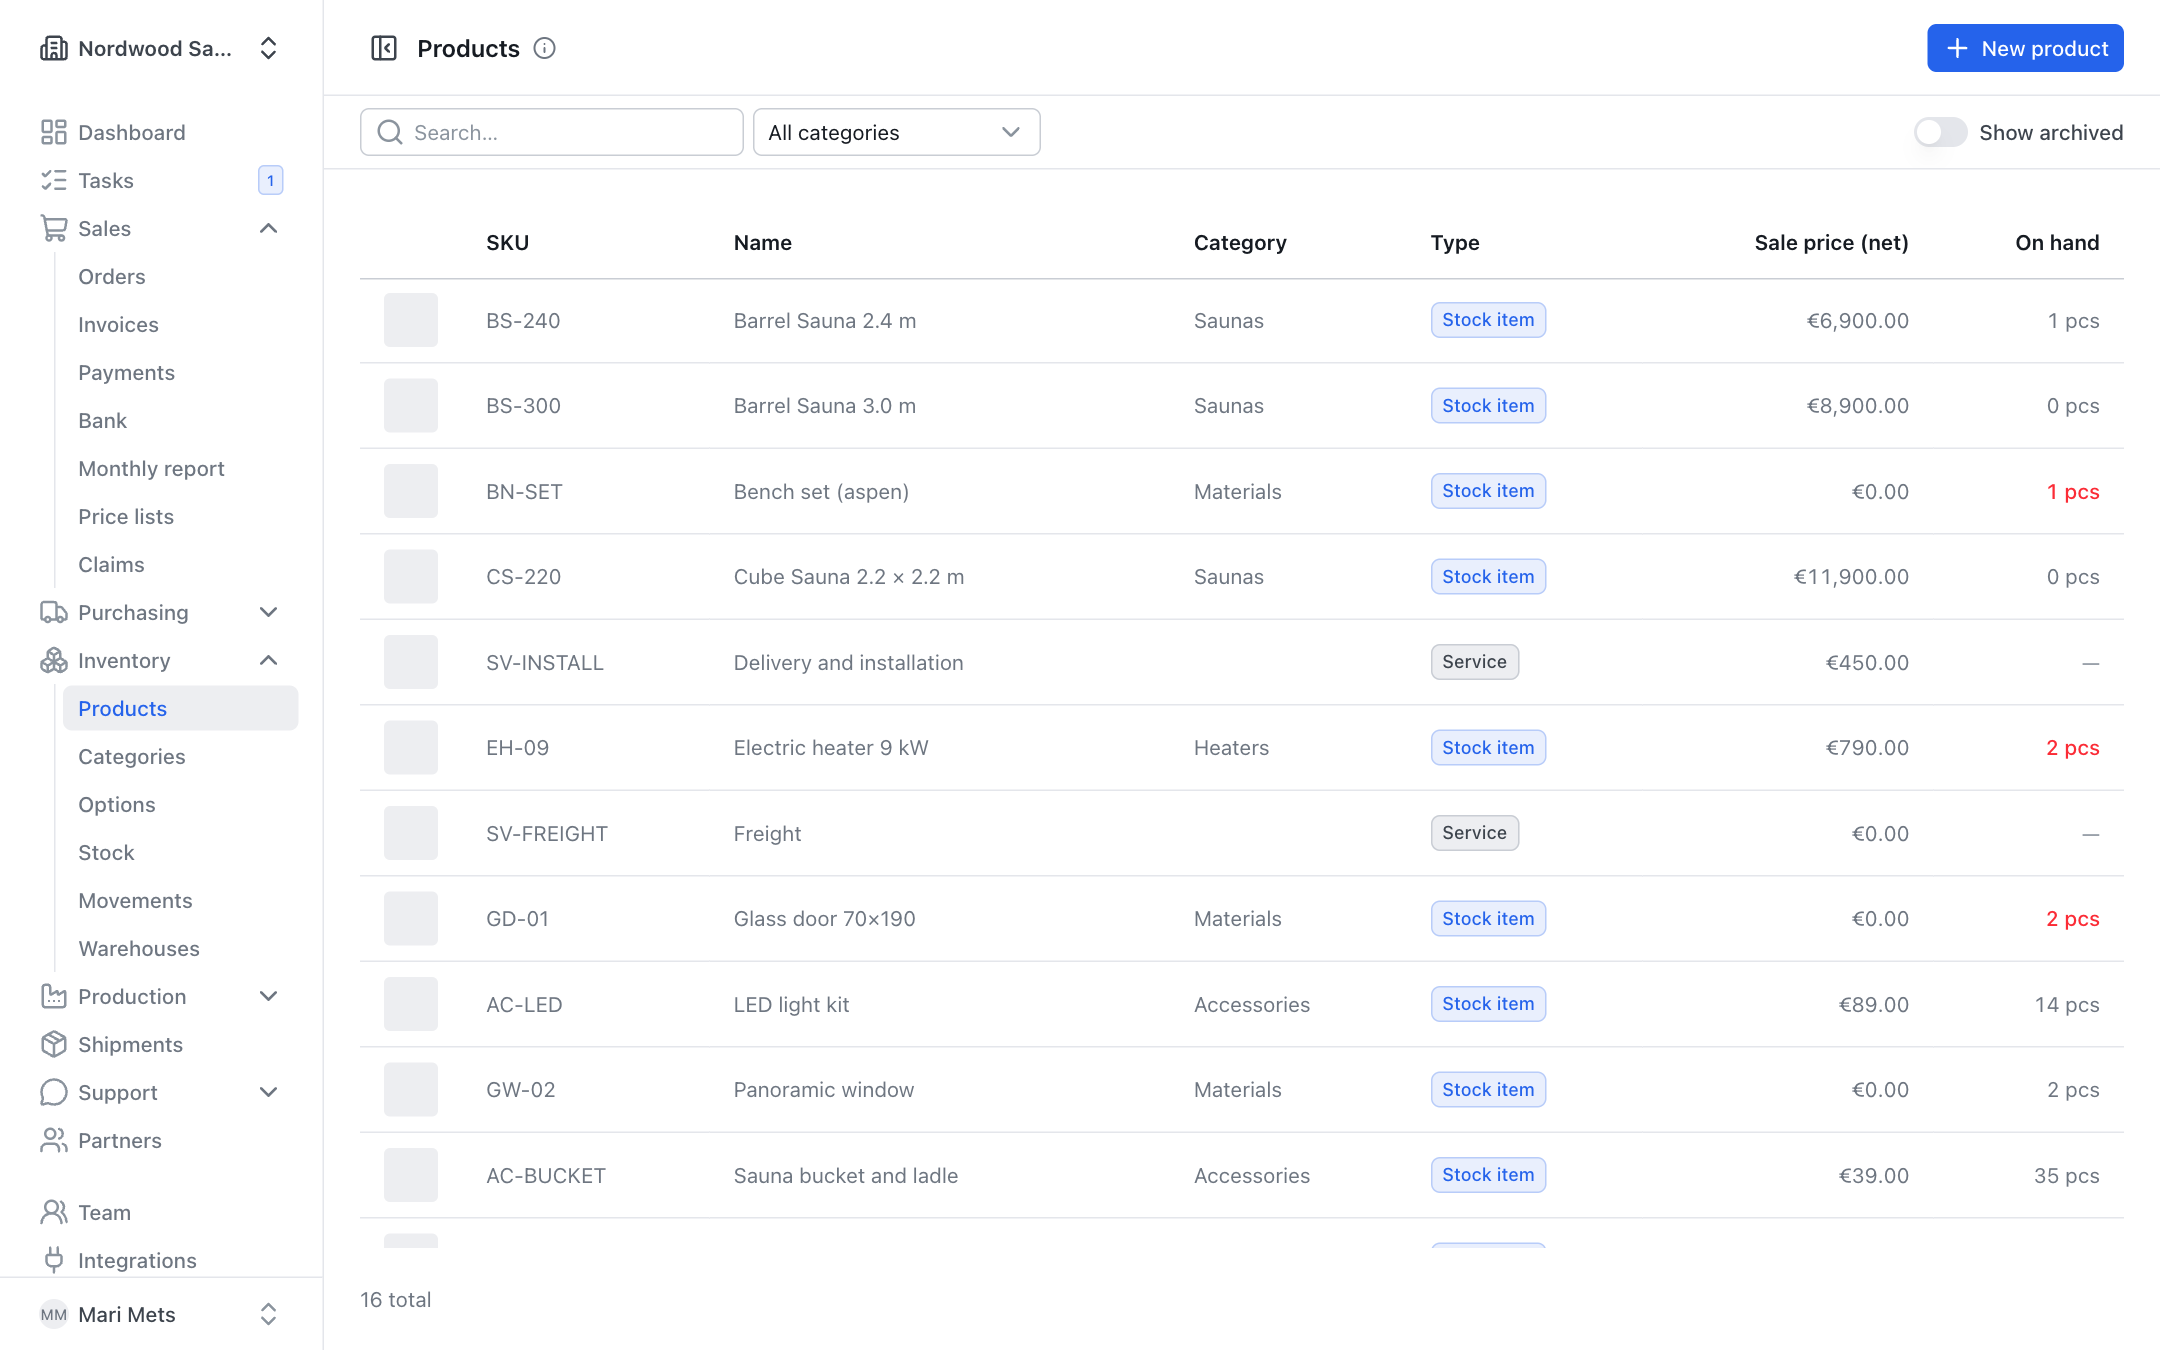
- Open Inventory → Products and press New product.
- Fill in the main fields:
- SKU (required) – your product code;
- Type – Stock item or Service;
- Name (required);
- Category and Description (optional);
- Sale price (net) – the price without VAT;
- Cost price – only visible to roles that see costs (see Team);
- VAT % – the VAT rate, 24 by default;
- Unit ("pcs" by default) and Barcode.
- Tick Used for: Sold, Purchased and/or Manufactured.
- Press Save.
TIP
You do not have to keep the cost price up to date by hand: when goods are received and when production is completed, ZERPY recalculates it (as an average price).
Used for: sold, purchased, manufactured
- Sold – the product can be sold; only sold products appear in the partner portal and the webshop API. A sold stock item can also have a Warranty (months) (counted from delivery).
- Purchased – you buy the product from a supplier; the Suppliers block appears (see below).
- Manufactured – you make the product yourself from a recipe (see Production).
Stock item fields
Stock items also have:
- Reorder level – when the available quantity drops to this level or below, the product is marked Low on the stock page and is suggested on the Reorder page (see Purchasing). In the product list, the on-hand quantity turns red when it is at or below the reorder level.
- Weight (kg), HS code (customs) and Country of origin – needed for export: they are printed on the invoice and the CMR consignment note.
- Serial numbers – see below.
Categories
Categories make products easier to find and quantity discounts easier to give (see Price lists). Each product has one category.
- Manage categories under Inventory → Categories: type a name and press New category. Use the pencil to rename one.
- You can also create a category right in the product form – type a new name in the Category field and pick it.
- When a category is deleted, its products become uncategorized. The products themselves are not deleted.
In the product list you can filter by category.
Images
Images can be added once the product is saved.
- Open the product.
- In the Images block, press Add images or drag the files there.
JPEG, PNG, WebP and GIF up to 10 MB are accepted, up to 12 images per product. The first image is the Main image – it is shown in lists, the partner portal and the webshop. Press Make main image to make another image the main one. Images are stored without location and camera data.
Suppliers
When a product is marked Purchased, you can add who sells it to you. Only roles that see costs see this block.
- Press Add supplier and choose the supplier.
- Fill in Their code (the supplier's product code – printed on the purchase order), Price, Min. qty, Pack of and Delivery time (days).
- Use the star to mark the Preferred supplier – used for reorder suggestions and the production plan.
The supplier's price is used on purchase orders and reorder suggestions. The suggested quantity is rounded up to the supplier's minimum quantity and pack size. When goods are received, the received price is stored as the supplier's latest price. See Purchasing.
Product options (configurable products)
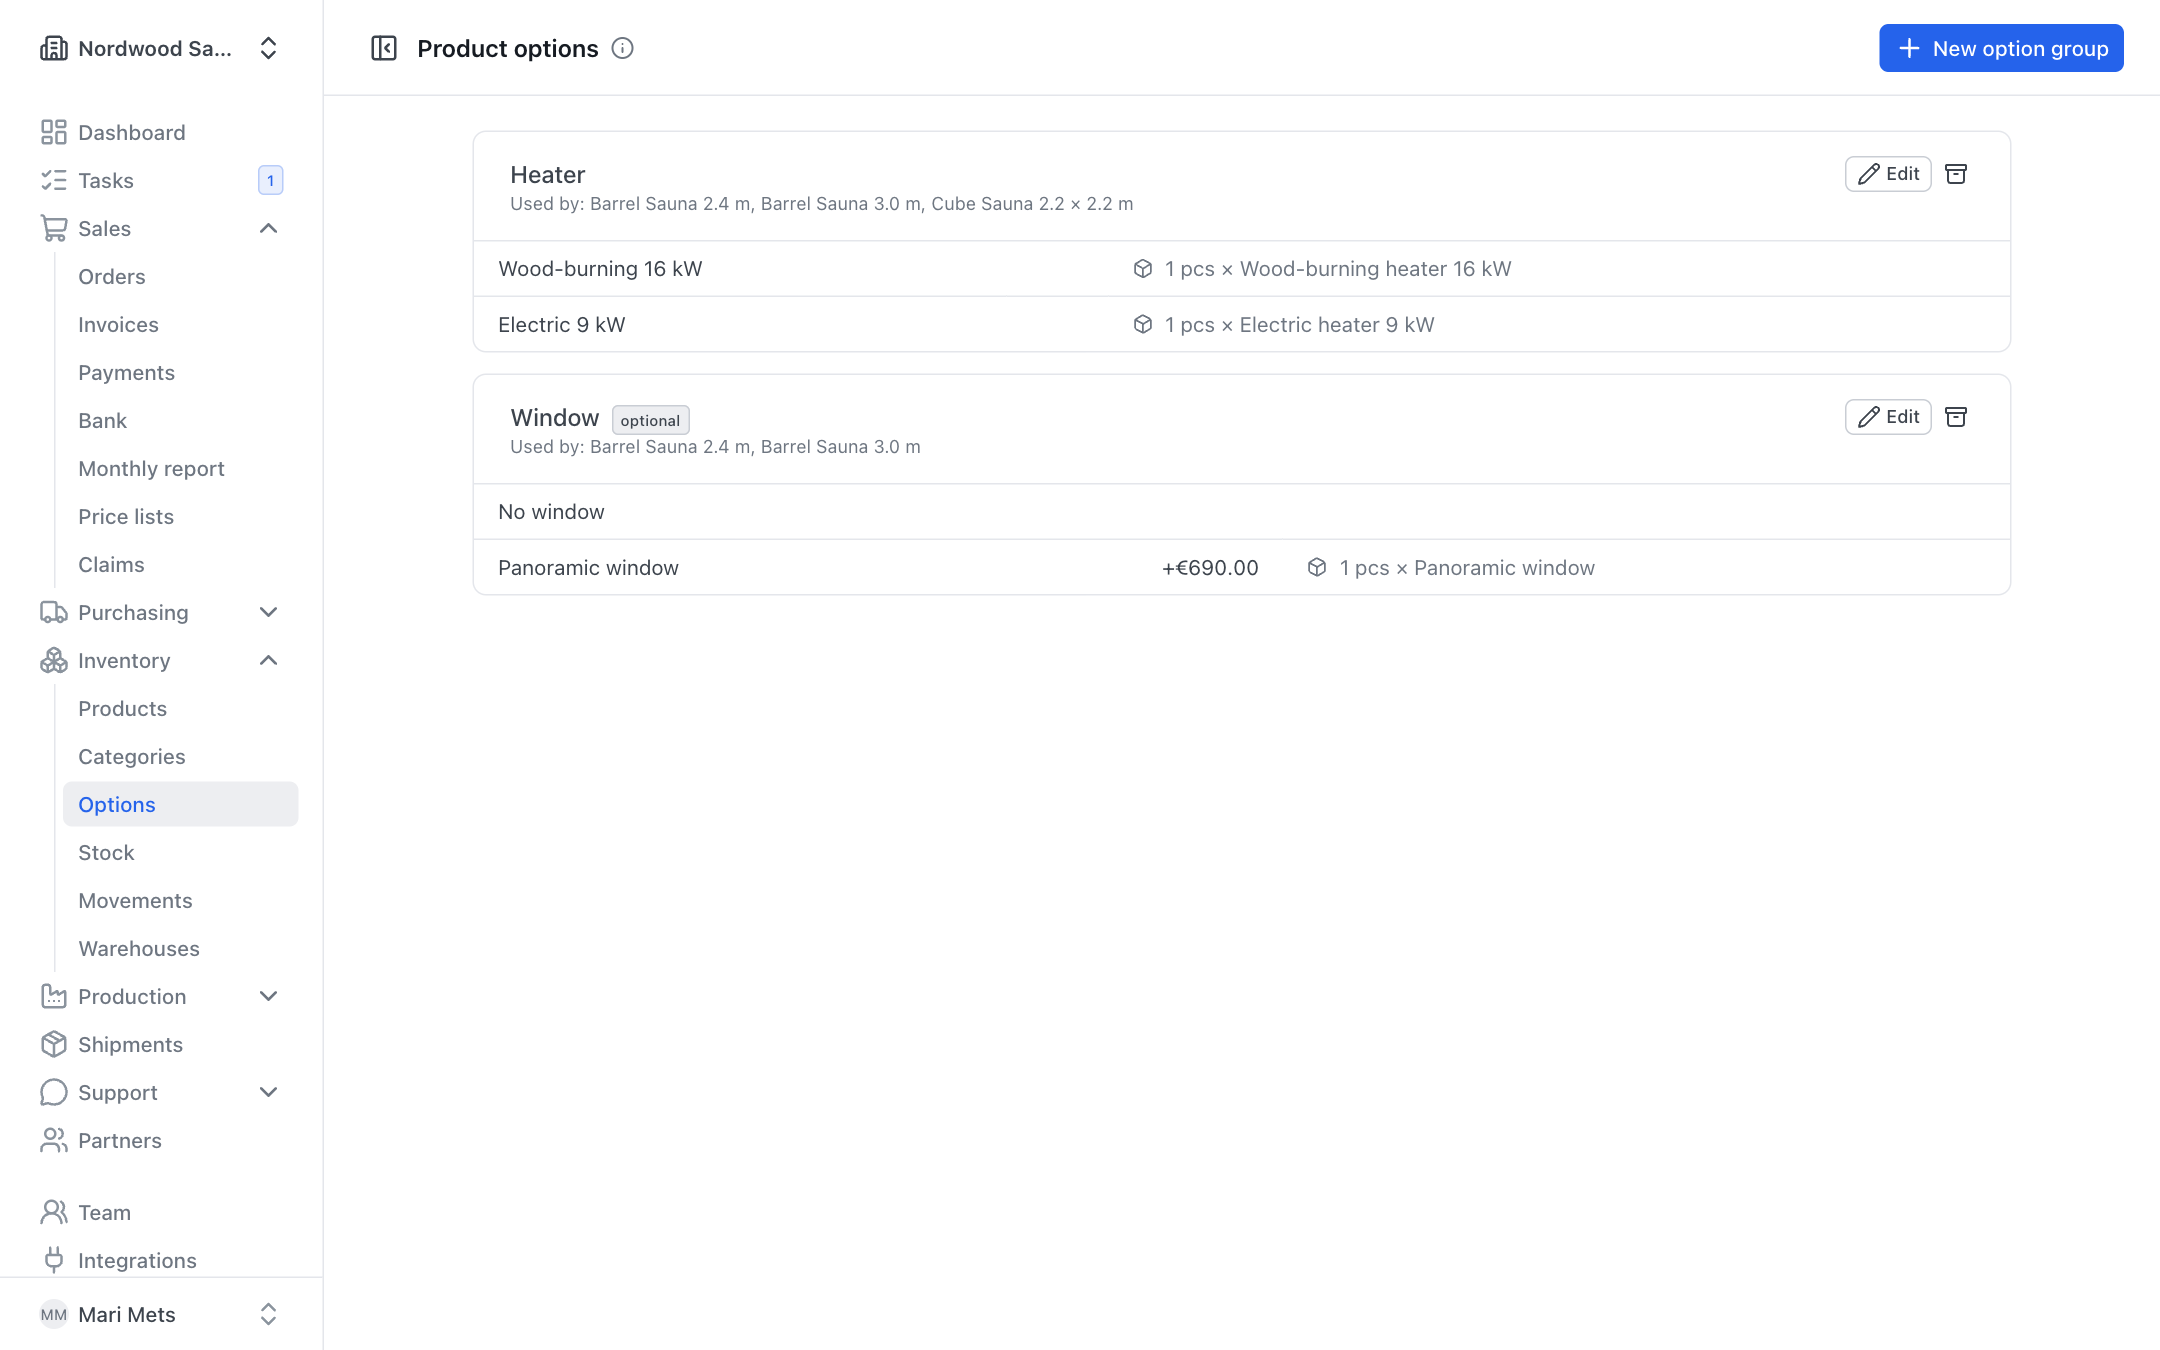
If a product is sold in different variants (e.g. heater type, facade colour), use product options.
- Open Inventory → Options and press New option group.
- Enter the Group name (e.g. "Heater"). Tick Must be chosen if the customer always has to pick something.
- Add Values (Add value). Each value has:
- Value – its name (e.g. "Harvia Cilindro 9 kW");
- Price add-on – the extra price, net, in your currency;
- Adds to production (optional) and Qty per unit – a stock item or service added to the production order.
- Press Save.
- Open the product (it must be Sold) and pick these groups in the Options field.
Now one value per group is chosen on every order line. The recipe holds the product's common parts; options add the variable ones. The choice is stored on the order, invoice and production order – if you later rename or reprice an option, old documents stay the same.
You can archive an option group. It disappears from products and new orders; existing orders and invoices keep the chosen options.
Translations
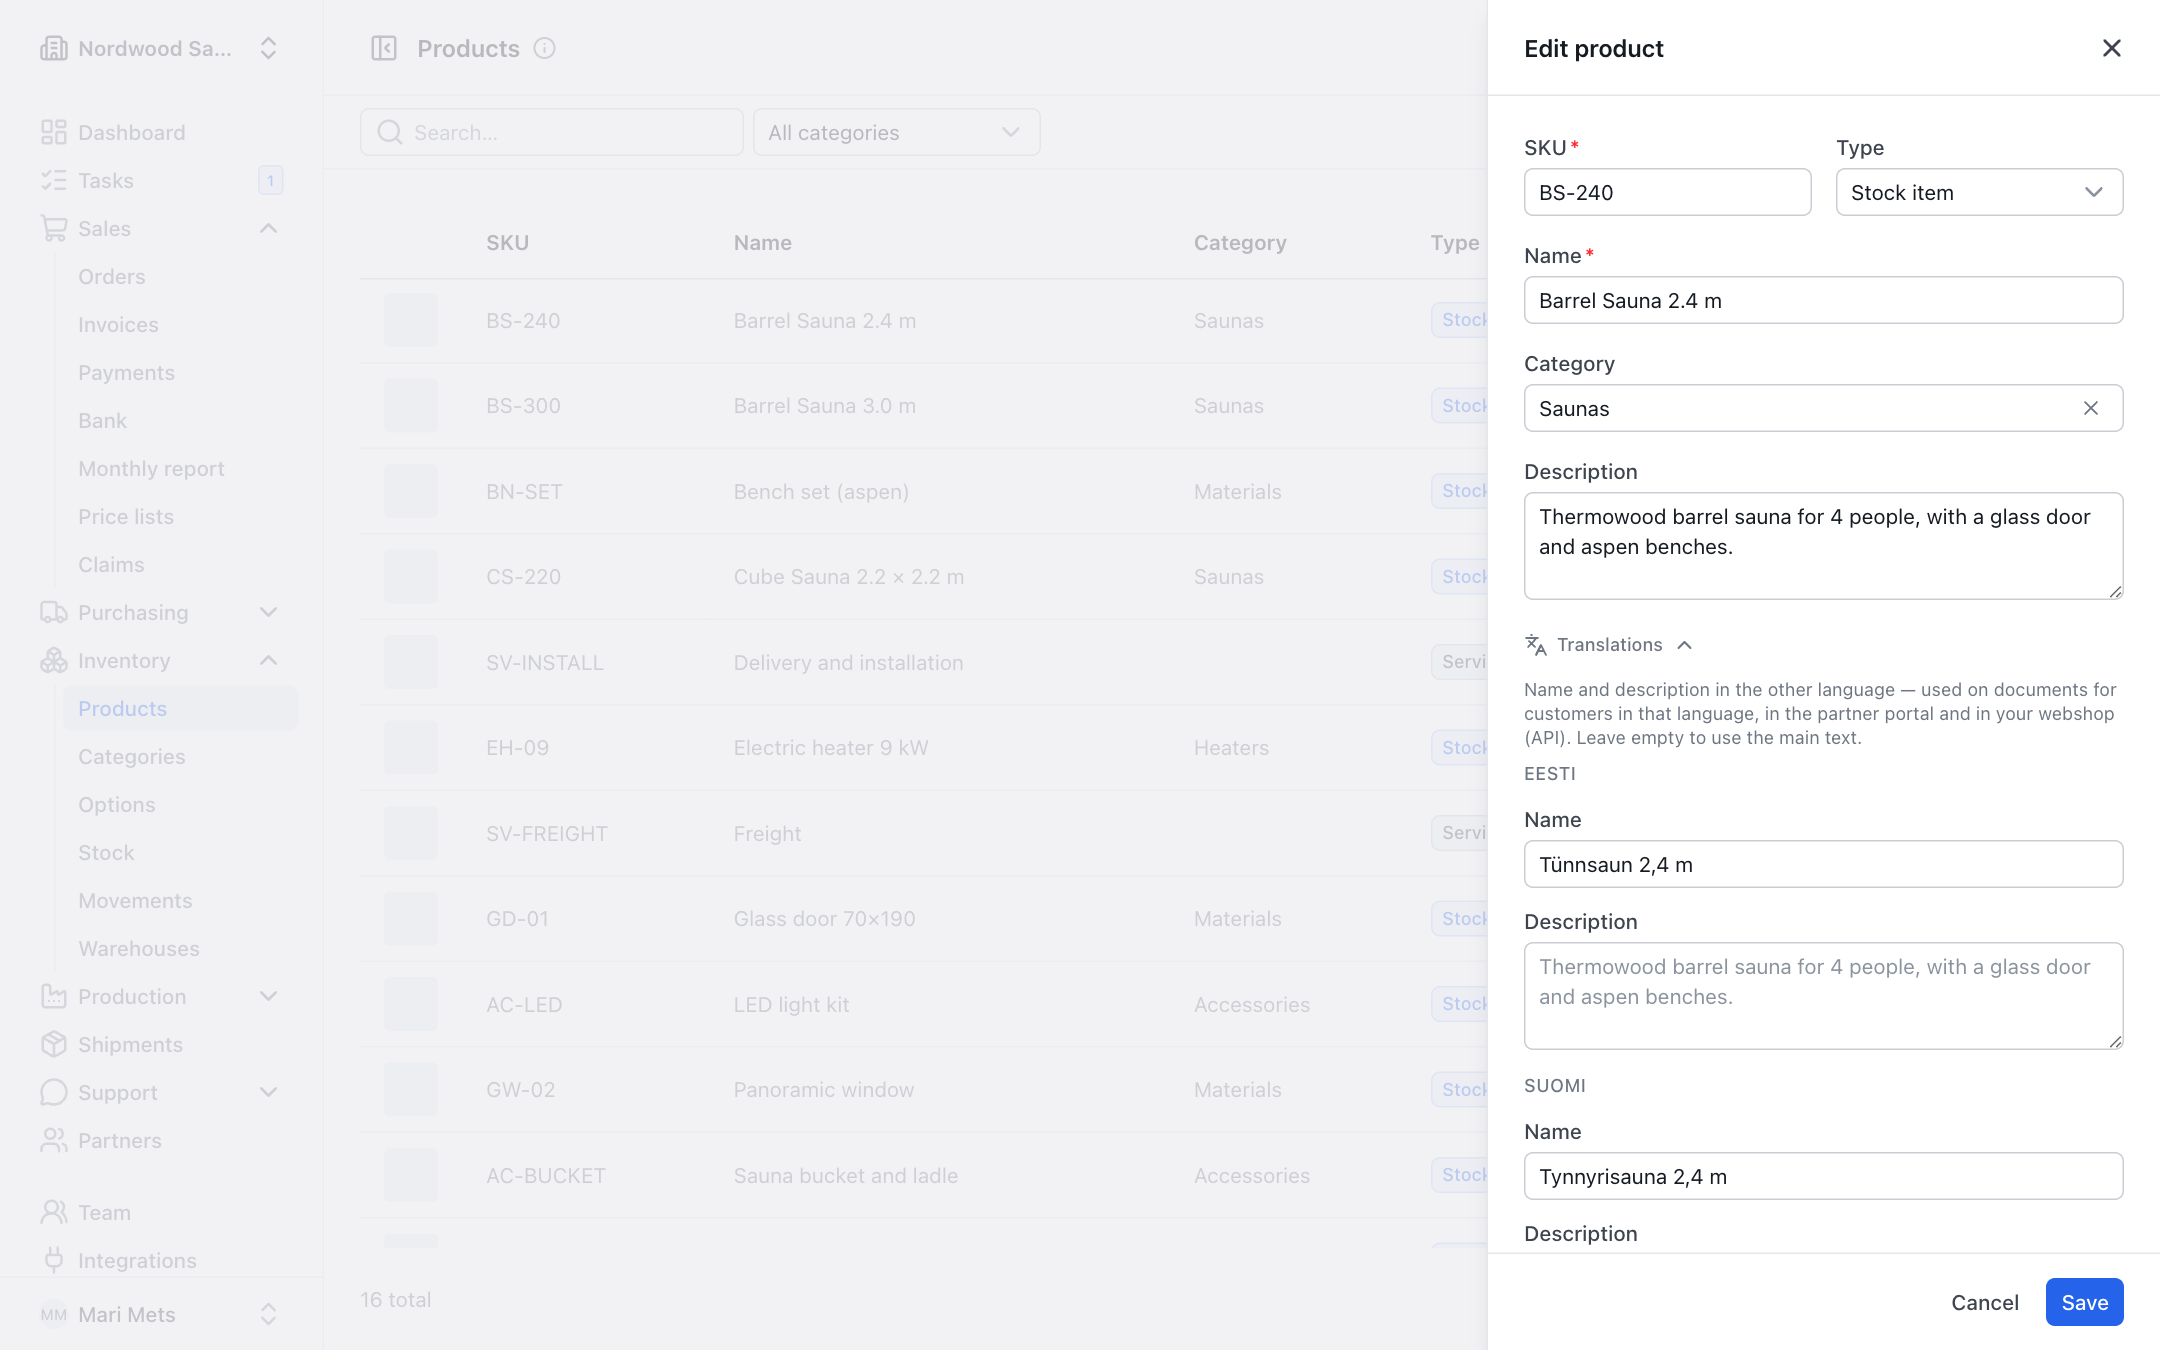
If you send documents in several languages, you can add the product's name and description in other languages.
- Open the product and press Translations.
- Fill in the name (and description) for each language offered.
English is offered, plus the languages chosen under Settings → Other document languages. An empty translation falls back to the main text. Translations are used on documents for customers in that language, in the partner portal and in the webshop. Option groups and their values have translation fields too.
Serial numbers
Tick Serial numbers on a stock item when every unit you produce needs its own number (e.g. every sauna).
- Such a product is produced in whole units. When production is completed, every unit gets a serial number.
- When shipping, the serial number is linked to the customer.
- Production → Serial numbers shows the full story of each unit: materials, suppliers, cost, customer, shipment and invoices.
See Production.
Recipe and structure
You build a product's recipe (what it is made of) under Production → Bills of materials. When a recipe contains intermediate products with their own recipe, the recipe list shows a … levels button – it opens the Structure with every level and the material cost. See Production.
Archiving
Products are not deleted but archived – so old orders and invoices stay intact.
- Open the product.
- Switch on Archived and press Save.
Archived products disappear from the list. To see them, switch on Show archived.